Use Basic Auth to connect Tango API
Although we still support Basic Authentication (Auth), we strongly encourage you to use OAuth 2.0 with Tango API. Basic Auth is less secure compared to OAuth. It relies on platform name and API key to identify you as the correct person with the online account credentials.
Note:Contact your Tango representative, or email [email protected] to enable the API key management on your production platform. You need the Tango API Key permission in the portal to access the API credentials. See how to Sign in to the Tango portal . If you don't have an account with Tango, see how to set up an account.
Best practices:
- For your security, Tango API key is masked in the Tango portal. Treat your API keys like passwords and do not share them with unauthorized parties or over unsecured communication channels.
- You can have up to two active API keys at the same time. However, we recommend you to keep only one active API key unless when you’re rotating your keys.
- Rotate API keys at least once every 90 days (quarterly), and immediately after any suspected compromise or personnel change involving key access. To avoid disruption when you rotate the keys, keep two API keys active until your integration is updated successfully. Deactivation cannot be undone.
How to use Basic Auth to secure your connection?
Follow the instructions below:
Step 1: Get the platform name and API key
You must have manage permissions for Tango API keys enabled for your user under the Integrations permissions. With the correct permissions, log in to the Tango portal and access the platform name and the API key. See Set up work environment for Tango API. Learn how to Set user permissions and access level.
Note:Keep sandbox and production credentials completely separate. Never use sandbox credentials in production. Use Tango’s sandbox environment to test your integration before going live.
To get the platform name and API key in the Tango portal:
- Log in to the Tango portal. See how to Sign in to Tango portal.
- Go to Team settings > API credentials on the left menu.
- Click API keys > Create credentials.
- Click copy next to the Platform name and API key, and keep them safe.
- (Optional) Enter a Display name to identify it later, then click Save display name.
A new key is generated and immediately accessible for use. You can have up to two active keys at any time.
Step 2: Test your integration
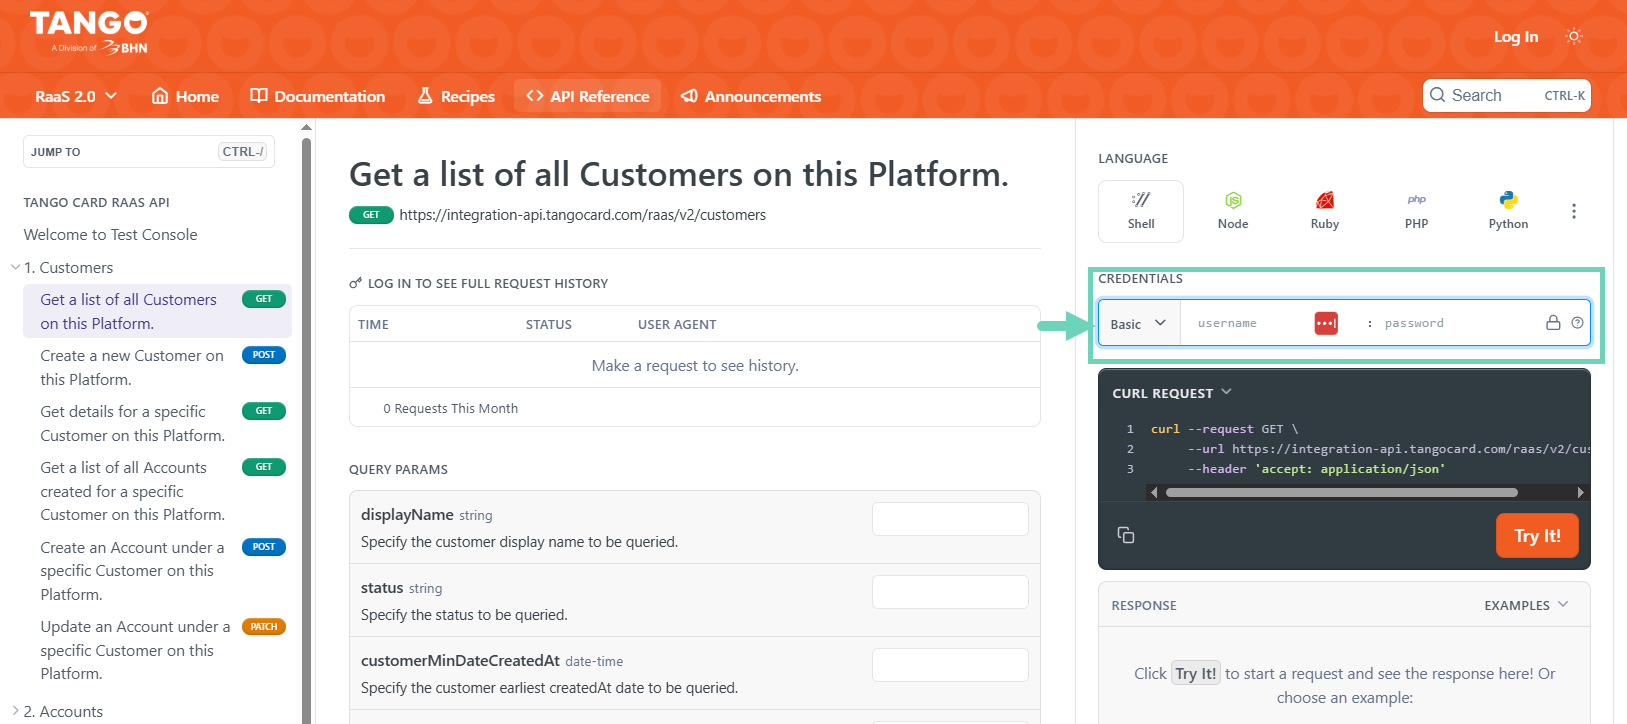
With your platform name and API key at hand, test your integration in Tango API test console to make sure the integration is working:
-
Open the Tango API test console.
-
Navigate to the API function you want to test, such as Get a list of all customers.
-
Make sure the credentials is set to Basic for Basic Auth.
-
Enter your platform name and password (API key) you've got from the Tango portal.
-
Click Try it to check the response. Verify the connection is established successfully.
[
  {
    "customerIdentifier": "G23539018",
    "displayName": "Sales",
    "status": "active",
    "createdAt": "2022-08-08T19:30:03.391Z",
    "accounts": [
      {
        "accountIdentifier": "A99301743",
        "accountNumber": "A99301743",
        "displayName": "Sales Incentive",
        "createdAt": "2022-08-08T19:30:03.746Z",
        "status": "ACTIVE",
        "currencyCode": "USD"
        }
    ]
  }
]
Step 3: Call the Tango API
Once you verify the integration is working, use your platform name and API key to generate an authorization header and call the API. See the example below:
 OkHttpClient client = new OkHttpClient();

Request request = new Request.Builder()
  .url("https://integration-api.tangocard.com/raas/v2/customers")
  .get()
  .addHeader("accept", "application/json")
  .addHeader("authorization", "Basic <base64(platformName:apiKey)>")
  .build();

Response response = client.newCall(request).execute();
```
How to deactivate API keys?
See our document Manage Basic Auth API keys in Tango.